Setting up WPForms and connecting it to your email provider is one of the steps to setting up a new theme that we get the most questions about because it seems a lot more complicated than it actually is.
The first thing you will need to do is go to WPForms > Settings, then click on Integrations.

You will see the name of your email provider on the Integrations page. I added them all here as an example, but you will see the name of the one you use near the top, with others grayed out below. (If you told us the name of your provider but have since changed to another, you should be able to find it by scrolling down the list. Click and install the integration. At this time, Flodesk requires a separate plugin that we need to install so that won’t be on the list.)

Next, click on the name of the provider that you use. Click on + Add New Account, then fill in the fields that pop up. MailChimp and Flodesk ask for an API Key and then you can make up a nickname for your account. ConvertKit requires both an API Key and a secret key. (These can be found on your account page in ConvertKit.)
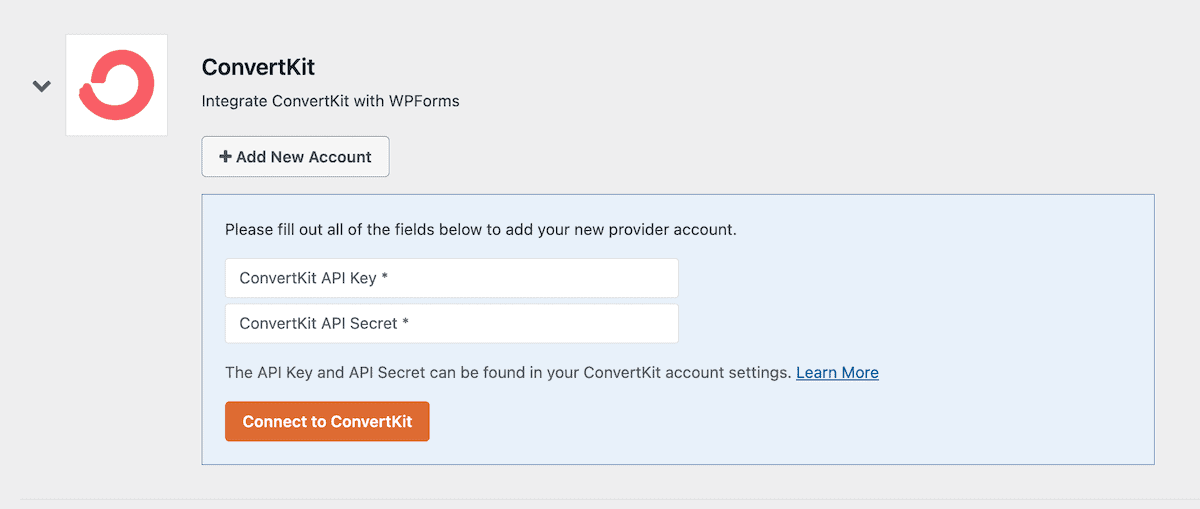
Once your API Key (or whatever your provider asks for) is added, you should receive a message telling you whether or not it is connected.
Where Do You Find Your API Key?
- Follow these steps to find your Flodesk API Key
- Your ConvertKit API Key & Secret Key are on your Advanced Settings Page
- Follow these steps to generate a Mailchimp API Key
Connect Each Individual Form
Once that is done, the next step is to connect each form to a list, form, or feed. This is the part that is kind of confusing, so I want to explain why we do this.
WPForms does a bit of a handoff between the person filling out the form and your email provider. The form takes in the information from the user and then sends it to the email provider. This allows us to use lightweight forms that don’t load 15 font variations (and only use one) or run lots of JavaScript behind the scenes.
In our case, most people have a Save the Recipe form and an Email Subscription form.
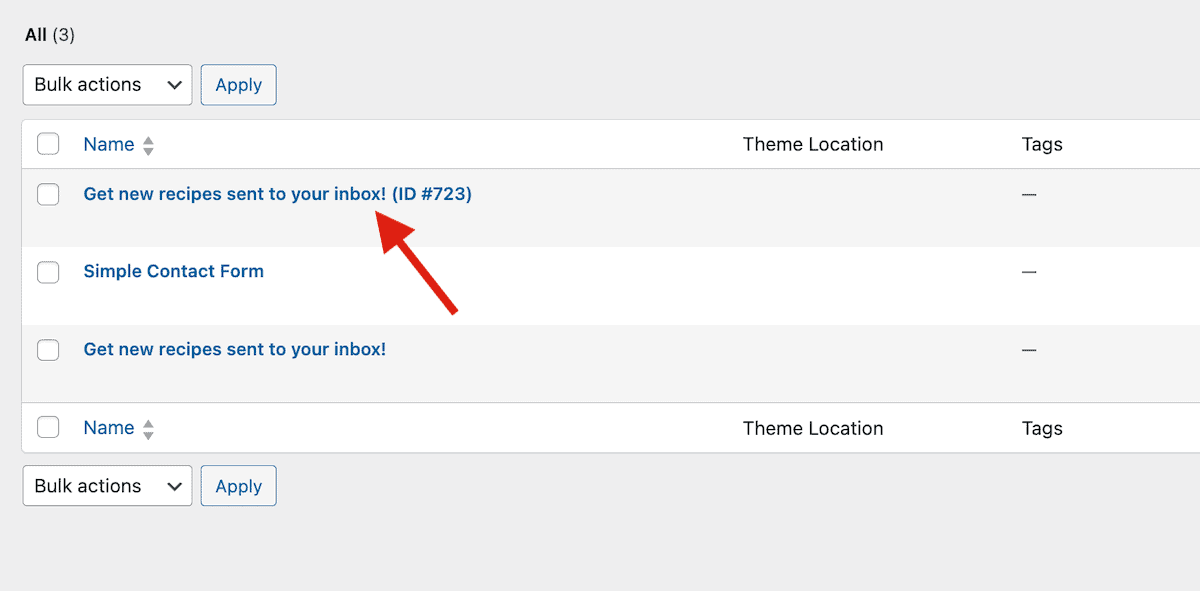
If you go to WPForms > All Forms, then hover near the form you want to update, you will see some options appear.

You will choose Edit, then go to the Marketing tab. Click on your email provider, then click on “Add New Connection” in the top right corner. It will then prompt you to fill in a bunch of fields. Each provider has different options and each form has different options, so what you see will depend on your email provider.
This is where it can get a little confusing. Depending on the form you are editing in WPForms, you will want to select a corresponding form name from your email provider. WPForms is essentially going to fill out this form for you (as the user) whenever the form on your site is filled out.
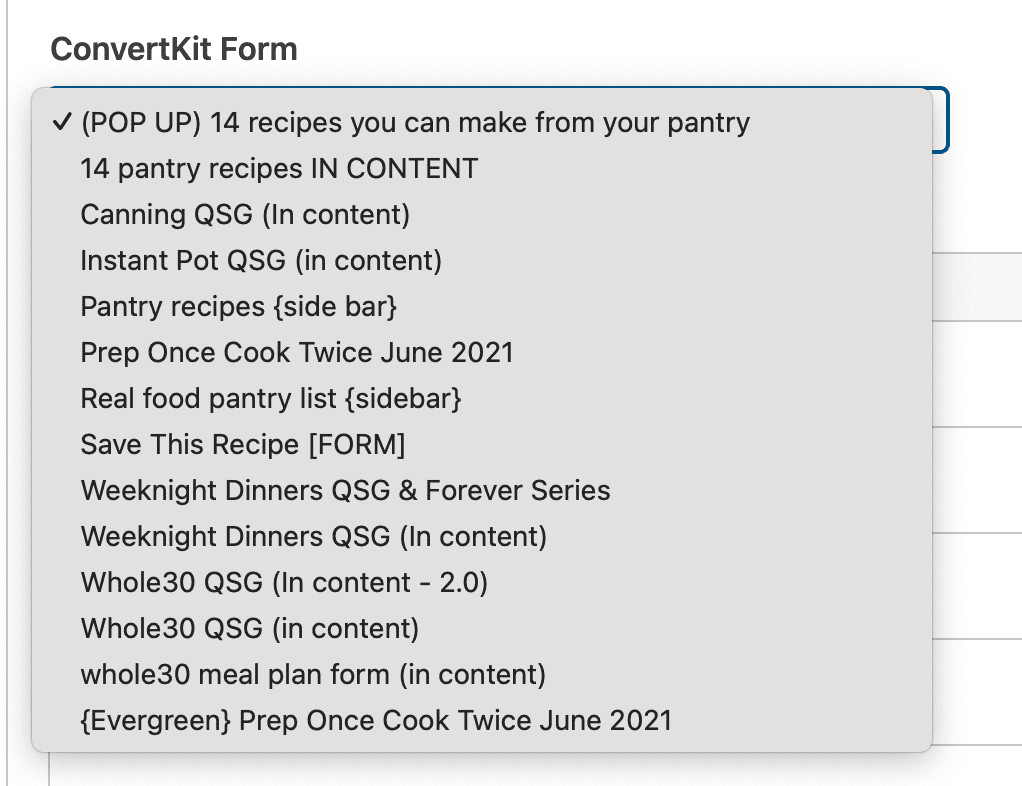
Here’s an example. If you have a form in ConvertKit called Weeknight Meals QSG & Forever Series that your email signups go to (this is someone’s Quick Start Guide, then goes into a Forever Series) – you will select that in the dropdown. The ConvertKit form has fields called Name and Email, so you will then match the Name and Email Fields in the next set of dropdowns.

Once connected, WPForms will pass the name and email to your email provider and they will send any email confirmation or freebies that are usually sent when readers used to fill out that same form on your site.
You would then repeat the same thing for your Save the Recipe form, though that one only has an Email Field. (The Saved Recipe email will be sent by WPForms unless you change it to your email provider.) We have a separate article about how to customize your WPForms emails because this would go on forever otherwise. And if you want to have ConvertKit send your Save the Recipe emails, that’s also a different article. (The only caveat with having ConvertKit send your Save the Recipe emails is you can only send one email to the same person every 12 hours. WPForms has no limit.)
Creating More Forms
If you are like the person I copied that long list of forms from and you want to add some different opt-ins to your content, you can also clone your forms and edit them. Say you want to make an Instant Pot Guide. You can clone the email form that we made for you:

But you MUST make changes to it to use it. WPForms won’t allow the same form to show twice on the same page and computers get really confused if you have two of the same thing.
Once you edit the form, you can add it to your content the same way that you would any of the other forms. If you want to add it to every post, you can add it to a Block Area – or if you have a targeted audience, you can make a specific form, like an Instant Pot Guide.

You can edit the name and description under General, then you can add it to Instant Pot categories and Instant Pot recipes only.

Tip
If you have ever collected subscribers without names, make sure that you set a fallback name in your email greeting –
In ConvertKit, you would normally use Hey {{ subscriber.first_name }}, to add a name, but if you don’t have a first name, it will say “Hey ,” which looks kind of weird. If you use Hey {{ subscriber.first_name | strip | default: “there” }}, it will say “Hey there,” if you don’t have a first name.
Just don’t do what I did once and use “there” as the default on emails starting with Dear. Oops. (Most providers have a way of doing this, you just might need to look through their documentation to see how to do it for your specific provider.)